
Woman in red
Materials here
Files in the material:
Open the tubes in Paint Shop Pro
Gradienten in this folder: Documents\Corel PaintShop Pro\17.0\Gradients
Selectionerne in this folder: Documents\Corel PaintShop Pro\17.0\Selections
*****
1. Open a new image 850 x 625 pixels
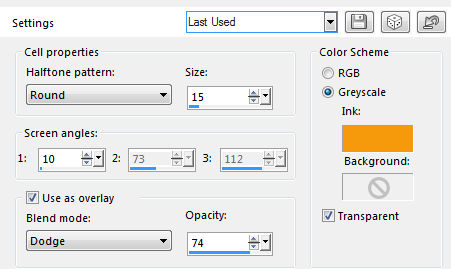
2. Foreground gradient Bhw_justducky:
3. Floodfill with the gradient
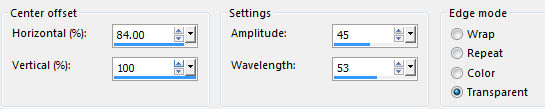
4. Effects - Artistic Effects - Halftone - color #f69a0e
5. Layers - Duplicate
6. Layer Properties - Blend Mode Burn
7. Layers - Merge Visible
8. Repeat step 5+6+7
9. Layers - Duplicate
10. Effects - Distortion Effects - Ripple
11. Selections - Load/Save Selection - Load Selection from disk
12. Find the selection: Zoee_cirkel
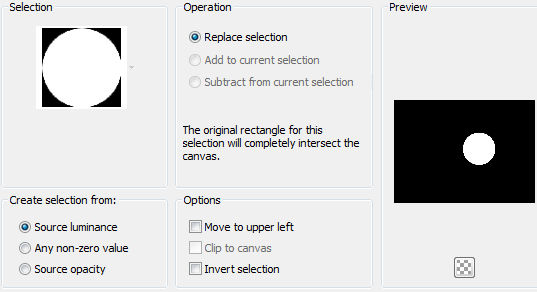
13. Selections - invert
14. Edit - Cut (or press delete on your keyboard)
15. Selections - Select none
16. Effects - 3D Effects - Drop Shadow - Color #4d0300
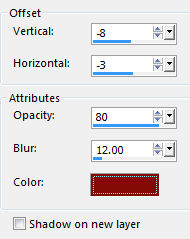
17. Repeat Drop Shadow but change Vertical to 8 and Horizontal to 3
18. Layers - New Raster Layer
19. Selections - Load/Save Selection - Load Selection from disk
20. Find selection: Zoee_streg - settings as before
21. Flood Fill the selection with this color - #c30000
22. Selections - Select none
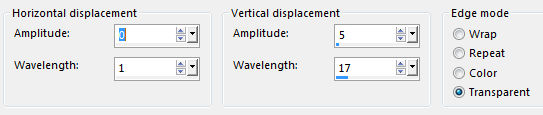
23. Effects - Distortion Effects - Wave
24. Image - Free Rotate
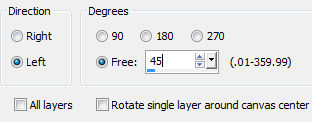
25. Move it to the top left corner as in my picture
26. Layers Duplicate
27. Image - Mirror - Mirror Horizontal (Mirror in older PSP versions)
28. Layers - Merge Down
29. Layers - Properties - Opacity 90
30. Activate the layer with the circle
31. Layers - Duplicate
32. Resize 506 x 372 pixel - uncheck Resize All Layers
33. Layers - Properties - Opacity 75
34. Move it to the top left corner as in my picture
35. Layers - Duplicate
36. Image - Mirror - Mirror Horizontal (Mirror in older PSP versions)
37. Layers - Merge Down
38. Adjust - Sharpness - Sharpen
39. Effects - 3D Effects . Drop Shadows - settings as before
40. Open the tube with the flower - Edit - Copy
41. On your image - Edit - Paste as New Layer
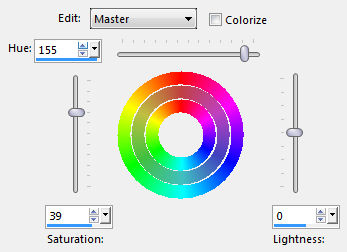
42.
Adjust - Hue and
Saturation - Hue/Saturation/Lightness
Press the little arrow and find the preset 'Default'
Then set these settings
43. Image - Free Rotate - Check left and 180
44. Layers - Duplicate
45. Image - Free Rotate - as before
46. Put the two flowers togheter as on my picture
47. Layers - Merge Down
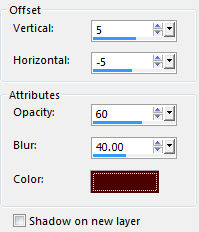
48. Effects - 3D Effects - Drop Shadow
49. Open the tube with the woman - Edit - Copy
50. On your image - Edit - Paste as New Layer
51. Resize 634 x 466 pixel - Uncheck Resize All Layers
52. Effects - 3D
Effects - Drop Shadow - color as before but with these settings
30
-70
50
30
53. Move the Ball into her hand
54. Image - Add Borders - Red color - 2 pixel - check symmetric
55. Image - Add Borders - Yellow color - 10 pixel - check symmetric
56. Image - Add Borders - Red Color - 2 pixel - check symmetric
57. Image - Add Borders - Yellow color - 20 pixel - check symmetric
58. Magic Wand Tool - Feather and Tolerance 0 and mark the last yellow border
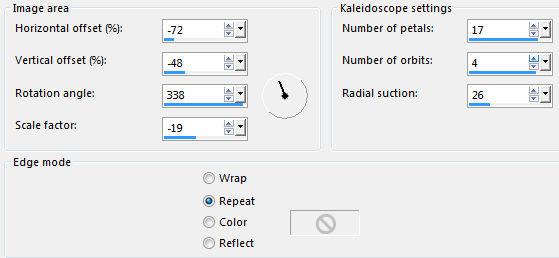
59. Effects - Reflection Effects - Kaleidoscope
60. Selections - Select None
61. Image - Add Borders - Red color - 2 pixel - check symmetric
62. Image - Add Borders - Yellow color - 10 pixel - check symmetric
63. Image - Add Borders - Red color - 2 pixel - check symmetric
64. Selections - Select All
65. Selections - Modify - Contract - sæt tallet til 48
66. Layers - New Raster Layer
67. Effects - 3D Effects - Cutout - color #4d0300:
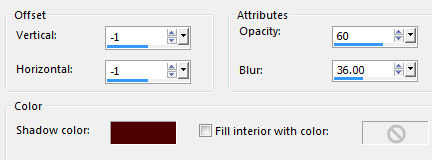
68. Repeat Cut Out but change Vertical og Horizontal to 1
69. Selections - Select None
70. Put your name on
71. Layers - Merge Visible
Save as JPG